Have you been to we love indie? No? Take a few minutes and go.
Category: save $
The boy’s bedroom redo
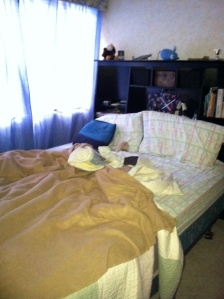
The boy’s boring bedroom- Before:

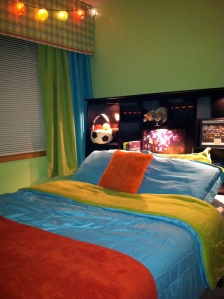
And the boy’s brilliant bedroom- After:
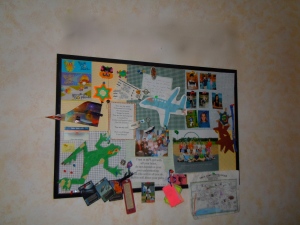
 Oh my, this was a super fun makeover! Please disregard the blurriness above the bulletin board- I blurred the wooden letters that spell out the boy’s name.
We started with this:
Back story~ Not too long ago, the boy moved to the guest bedroom because it was a bit roomier than his bedroom. Given its new occupant, it was time to change out the floral valance and paint over the yellow, white and cream sponge painting technique on the walls. Okay, maybe it was time to cover the sponge painting anyway, right?
It was time to update the bedroom for my preteen boy! First, the boy chose his colors: key lime green and bright aqua. Key lime? Bright aqua! Seriously?! Yup, and with orange and red accents, please. That’s what he wanted and, after gentle steering toward more sedate colors proved unsuccessful, that’s what he got.
Before he went to camp for a week, he helped pack up his room for the upcoming redo. We decided it would be fun for me to do the make-over “as a surprise.” He had picked the paint colors, but we planned that I would redo his room while he was gone, and then when he returned from camp we would have our own HGTV moment with a reveal!
See  the desk? Oh, my. What was I thinking when I originally painted that thing?! But, sweetly, the boy said he liked it Just the way it is (he was definitely trying to save me some work, sweet boy), but it got a well-deserved make-over too.
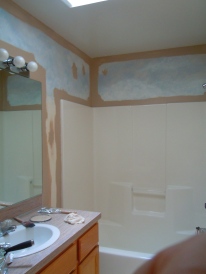
Aside~ At the same time I was getting ready to do his bedroom, I did his bathroom. See the several swaths of more calming colors I tried to decide to use on the wall in there? Look at two posts previous to this one to see how that make-over turned out.
The preteen helped get everything in his bedroom moved, the heaviest pieces of furniture were placed in the center of the room. See the wooden bird hanging from the ceiling in the top right of the picture below? It became a bird of a different color.
 When I started cutting in the new colors they virtually vibrated on the walls. The key lime and turquoise colors made me afraid. Very afraid.
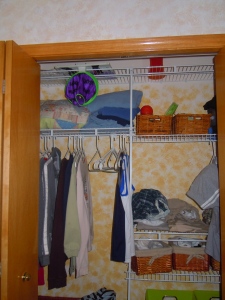
 Closet close to finished: the big brown dog approved.
The boy thought a basketball hoop at the end of his bed on his bedroom wall was a great idea. Me? Not so much. But it is his room so…
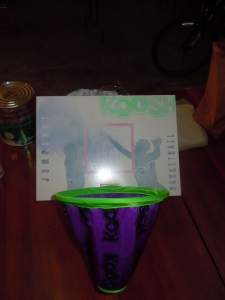 This old plastic indoor Koosh basketball hoop was a Goodwill find for only $1.50. I primed it, painted the center rim shot area with silver and red paint, and then added colorful paper I already had on hand. I used the same paper to cover the light switch (notice that during the reveal photos, later). After, covering it, out came the Mod Podge to seal everything. I turned the basketball hoop inside out so that the word “Koosh” that was splattered all over it would be less obtrusive, and I also made the bottom opening larger to accommodate a bigger ball, trimming it in coordinating orange bias tape to finish it off.
Here’s a shot of that bird of a different color! I love how it turned out. I offers a very fun punch of color! The bird was a wooden puzzle the boy’s grandma gave him to work on one day as they waited for me at a doctor’s appointment. It was lovely natural but I think it is WOW painted orange. 🙂
The abstract artwork on the orange wire shelf, made by the boy in art at school and framed in a $2 frame from Goodwill, is now proudly hung on the turquoise wall.
Allow me to interrupt this boy’s bedroom make-over to bring you a Helpful Hint: Clean up as you go!  But if you plan to use the same brushes and roller for the same colors later, or even the next day, and you don’t want to wash and rinse out your brushes, simply wrap them separately in plastic wrap. That little trick works great!
There on the bookshelf headboard is the raggedy old stuffed cat my son has slept with since he was a baby. That cat used to be big and fluffy. Now it is sunken and all but bald from being petted and well-loved (I even made it a fur suit to cover its pitiful nakedness.) On either side of it are black woven baskets from the Dollar Store ($2/each), which I wove in some orange bias tape and turquoise cord– they are rather hard to see in the photo, however.
Notice the desk has been painted? And the old Herman Miller orange plastic chair I pulled out of a garbage dumpster years ago- free! To the left of the bulletin board is my son’s name in large black wooden letters, running vertically, which I blurred out. The photo on the right was taken after he got all his stuff “organized” on the desk.
The turquoise color on the side of the desk is the same paint as the turquoise wall color. It is not nearly as bright as it appears to be in the photo.
We already had the Kandinsky print in the lower level but I thought it would bring so many of the bedroom colors together so I hauled it upstairs The print and colorful paper lanterns strung across the valance mirror each other and work well together.
I still need to make the bed skirt, which will be made out of the same material as the valance and have a two-inch border at the bottom of orange fabric (the same fabric with which I covered the spray painted orange lamp).
I seriously worked the full week while he was at camp, getting the bedroom and bathroom finished. On the day he returned, we had the reveal! It was ALL worth it!
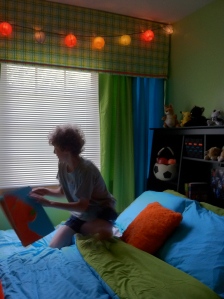
I think he likes his new room!
The painting he is holding is of his dog, which I painted in the colors of his room. Fun!
Home sweet home.
The Boy’s Bathroom
I’ve been very busy in the last week redoing the boy’s bathroom and bedroom. His bathroom really, really, reeeallly needed an update. Someone’s little fingers had pulled at the seams of the seashell wallpaper and ocean beach scene border, so it had certainly seen better days. A few days before the boy went to camp for a week, I gathered a wallpaper scoring tool, a water bottle to use to saturate the paper, a scraper, and a large sponge and started in…  D and I removed shelves and baseboard trim that needed to be revarnished. Then I scored the paper with the tool. See the little holes it leaves? You need to be careful not to apply too much pressure or you will end up leaving holes in the drywall.
Next, we used a water bottle to saturate the paper really well, hoping it would be a cinch to remove since I had sized the walls before papering but, still, it was very slow going.  The shelves we removed were white, ran the length of the walls above the toilet and far counter, and were mounted above the border on the two far walls (sorry, no pictures, because once I decide to do something I usually jump in and tackle it, neglecting to get Before pics.) The “sky” above the old border is not paper it was painted to match the sky in the top of the border. I had painted it above the border, up the walls, onto the ceiling, and into the skylight shaft when I first did the bathroom.
  I thought this bathroom was mighty cute in its day, with its nod to Florida but, alas, it was time for it to go, go, go. And after hours and hours of stripping and washing walls, the paper was finally gone and it was time to paint. First, the ceiling went bright white!
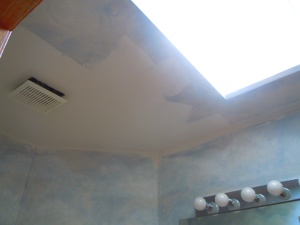
It felt fresh and bright and I was pleased to see the transformation. Before I painted, I wondered whether or not to leave the skylight shaft painted like the sky or paint it white like the ceiling. I ended up painting it out to match the ceiling and LOVED the result. After, the REAL sky wa s the main star.
Isn’t the patch of blue sky pretty?
It was a little sputter and start to get the wall color nailed down. But after two trips to the paint store and several choices, finally, a color was found that matched the crazy laminate.
After spackling holes and sanding, and spackling and sanding some more, the cutting in began. 
Hey, notice the gigantic ’90s builder-grade mirror? Keep an eye on it because after the painting is complete it is going to change… for less than $20! Yes!
But before we see the fun and cool After photos, let me tell you about the trouble I found. Hang on people, it’s scary. What is that in the photo, you ask. It’s a disgusting mess, that’s what it is! It is peeling vinyl flooring with black mold underneath. It is right next to the tub. Water causes black mold, folks. Killer. Black. Mold. Yikes!
 So I pulled off the baseboard, which needed to be restained and varnished anyway, and sprayed it with straight bleach. I was pleased to see the mold “die” and I cleaned it up really, really well. Then I pulled out all the old grout from in front of the tub. After letting the floor dry for a good day-and-a-half, I hot glued the vinyl back down (gotta love the hot glue gun!) and regrouted along the tub. To be proactive in not allowing the water to run out of the tub and cause the same problem again, I bought Spraymaid Bathtub Splash Guards to install on each end of the tub.
To further spruce up the newly-painted bathroom, I also bought a new toilet seat and lid with stainless steel hardware, and a new stainless handle since the original plastic handle had discolored and looked guh–ross! The new seat and handle were both very easy to install and only needed a screwdriver and pliers.
Remember that builder grade mirror? Well, people, with two lengths of pretty trim (approximately $6/each) and four on-sale ($1.39/each) medallions I picked up from Lowes, (painted front and back with some left over white paint), I transformed the look of the mirror into something soooo much better. I used a small level to make sure the medallions were level on the corners of the mirror and hot glued them in place. I made sure to not get the glue too close to the outside edges because the backside perimeter is reflected in the mirror (hence the reason I painted the backside). 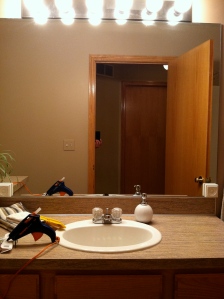 Next, I measured
 twice three times before cutting my first strip of molding with a small hacksaw. I cut from the frontside of the molding to the back, in case there might be any splintering of the wood. Luckily, it was a great fit. I sanded the edge a bit to smooth out the cut. Then I did it again…
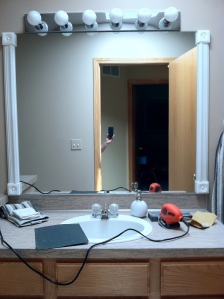 I did the same for all the sides and ended up with a spruced up mirror. Love it!
 Before After (Benjamin Moore- Truffle: AF-130)


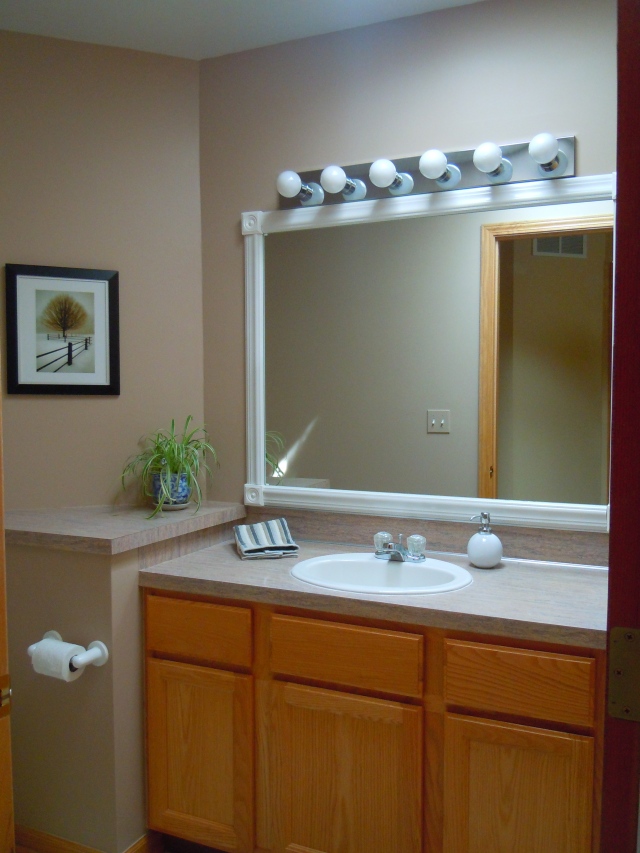

When he returned from camp, the long-legged boy loved his “new” bathroom. In fact, he wanted to take a bath in his bathtub (surprising, because on the rare occasions he takes a bath it is always in my big master bathroom tub). We got rid of all his old bath toys at the recent garage sale so I noticed he used Legos to play with in the tub. After his bath, I found this on the counter~
His Legos, spread out on the towel to dry. As a mom, it is little everyday scenes like this one that warm my heart.
Look for the boy’s bedroom redo post, coming soon

